Directly Accessing and adding a SSL cert to Plex on Unraid.

I know I have not written in a while, I have come to the conclusion I should not write for the sake of it.
This will be guiding you through the creation of a subdomain and then linking that directly to your routing the traffic in Pfsense to Plex running on your Unraid box and then adding an SSL certificate to this.
Step 1 Creating your subdomain
If you are like me and don't have your own private IP and like to access some of your services away from home you use a dynamic DNS service, Though what I'm listing will be similar if you have your own IP and use a non-dynamic DNS.
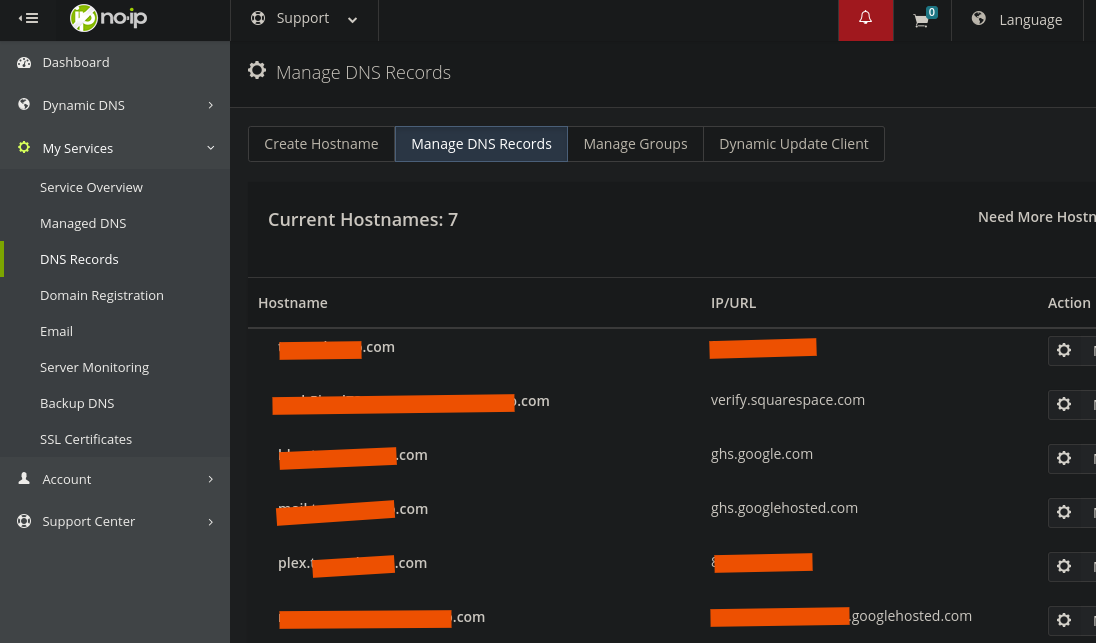
Log into your DNS Service and create a domain entry for plex.yourdomain. If using a dynamic DNS updater make sure this subdomain is listed in the domains it updates.
Step 2 Routing Inbound Traffic

Log into your PFSense Router and then go to Firewall > NAT.
Here we need to create the 2 below entries one for SSL traffic (443) and one for HTTP traffic (80), Then click on the Add button.
Interface: WAN
Protocol: TCP/UDP
Destination: WAN Adress
Destination port Range: 80(first rule) 443 (second rule)
Redirect target IP: IP of your Unraid box
Redirect target port: 8081 (for 80 rule) 8443 (for 443 rule)
Description: NGINX
Nat reflection: Enable NAT + Proxy
Step 3 Creation of a Proxynet

On your Unraid box go to Settings > Docker then
Enable Docker: No
And then apply, Once the screen refreshes on the top right select basic view this will then change to advanced view. Disabling of docker will allow you to change the “Preserve user-defined networks” option to yes. Apply this change and then re-enable docker.
Now open up the Unraid Terminal and type the below command.
Docker create network proxynet
Step 4 Docker

I am going to assume that you already have a docker instance running. We will first need to make a change to this. Go to the docker page in Unraid and Edit this container.
For network type select proxynet and for Fixed IP clear this if you had any entries. Hit apply and the docker will re-load. If you had any rules pointing to a fixed IP you will need to repoint them now to the IP of your Unraid box.
Now we need to install letsencrypt, This is easily done through the apps tab which is a very helpful plugin that has lots of docker containers with some settings applied and some partially applied.
Optional (Apps plugin not installed)

If you don't have this plugin installed the link is below.
You install this by going to Plugins > Install Plugins then pasting the link above, below “Enter URL of remote plugin file or local plugin file” and then press the install button.

Select the App tab and in the search box type “LetsEncrypt” select the download icon, This will bring up a configuration window.
Enter the values below.
Network Type: proxynet
Fixed IP: Blank
Http: 8081
Https: 8443
E-mail: your e-mail
Domain: the top domain for your DNS ie contcosso.com
Subdomain(s): this is a list for the subdomains you will be using, in this case, we will be using plex. You can use multiple and I will detail this in a later project
Only Subdomains: true
Then hit apply and the configured docker will be installed.
Step 5 NGINX and SSL

Now that Letsencrypt is installed we need to verify that its running and that your cert has been obtained. On the right-hand side of the screen, you should see a white icon on the same line as letsencrypt. Click on this and you will see the logs for that docker container if everything has been configured correctly you will see a line with “server ready” and no red lines.
Now we need to configure the letsencrypt docker’s NGINX application. This is done by editing a file within the containers AppData which is best done through a desktop text editor. Share your AppData folder using the shares tab then browse to the below location
//Unraidboxip/appdata/letsencrypt/nginx/proxy-confs
Find a file called plex.subdomain.conf.sample and open it in notepad.
replace the “http://$upstream_plex:32400;" with "http://unraidboxip:32400;" . Then save the file removing sample from the end so you have a file called plex.subdomain.conf.sample .
Reload the Letsencrypt docker and look for the server ready in the log again. Now you need to make a change to the plex docker.
Left-click on the plex docker and click edit. Scroll to the bottom of the variables and right-click on “Add another Path, Port, Variable, Label or Device”.
Config Type: Path
Container Path: /letsencrypt
Host Path: /mnt/user/data/letsencrypt/
Hit add and then apply and the docker container will reload. Then next part we need to change is from within Plex.
Go to the Plex website and then click on the settings icon in the upper right of the screen. On the left scroll down to network and select it. Then if not already showing the advanced click “show advanced” in the top right.
Enter the below variables.
Custom certificate location: /letsencrypt/keys/letsencrypt/privkey.pfx
Custom certificate encryption key: /letsencrypt/keys/letsencrypt/privkey.pem
Custom certificate domain: plex.yourdomain.com
Custom server access URLs: https://plex.yourdomain.coml:443
Save then reload your plex docker and you will now be able to access your plex directly over an SSL connection.
Step 6 (Optional) When your internal DNS domain and External DNS domain have different controllers but the same name.

In my set up both my AD domain and my website domain are the same as such DNS requests for my plex.yourdomain.com hit my DNS server and stop before getting to my Dynamic DNS provider. And as I can't put a dynamic entry into windows server DNS, So I came up with the below workaround.
First I needed to create a target so the NAT port translation can take the 443 and 80 traffic and send it to plex’s 32400. For this, I chose to use a virtual IP. After logging into your PFSense Router select Firewall > Virtual IP’s. On the new page, select add and then enter the below.
Type: IP Alias
Interface: If you only have the one subnet this is simple if like me you have allot, Select the same subnet your server is on.
Adress: Free IP in your subnet with the same mask.
Description: Name that means something to you.
Next, the NAT needs to be configured to allow port translation, Select Firewall > NAT and select Add. You will need to create 2 of these as before creating the incoming port NAT’s exept the below 2 options will be as below
Interface: Same as the subnet your Unraid box is on.
Destination: Select the VIP you created.