Novices Guide to VLANS (Discovered through trial, and much error)

I am going to start this with saying i am not an expert on VLANS this is just a guide from my experiences setting up VLANS with my equipment.
I recommend if possible setting up your equipment separately from your current network as it makes setup easier.
Step 1 Creating your VLANS
Part 1 Adding the VLANS
Login to your PFSense router then go to Interfaces > Assignments.
This will open a new page.

Select VLANS from the sub-menu and then the green add button below.and it will load a new screen.

Unless you have more than 1 interface this should be the same as your LAN interface. I only have 1 local interface so this makes this option easy.
VLAN tag can be any number from 1-4094, However i suggest never using 1 as allot of networking gear will have 1 set by default and if your setting VLANS up for security you will want them to have no access.
VLAN Priority you can leave this as 0 unless one of your VLANS needs to have its packets handled asap, In which case you would increase this number.
Description is just that something to help you understand what this VLAN is for when doing further configuration down the line.
Part 2 Configuring VLAN Settings
Now we go back to Interfaces > Assignments which you can see below, as you can see i already have a few VLANS, But there is nothing stopping us from adding more.

First we need to add the VLANS we created to this page. Where it says available network ports there is a drop down. select your VLANS then click add. When you have added them all click save.
Now we need to do some initial configuration of the VLANS, Now that you have assigned your VLANS the text should have changed to blue. Click on this text and it will bring up a new screen.

First we need to set the Description, for some strange reason the one we set earlier does not carry over. To enable DHCP on the VLANS counter intuitively you need to set "IPv4 Configuration Type" to "Static IPv4". After this set the gateway IP by changing the "IPv4 Address" to your desired IP and then "/" to your desired sub net range. Now we can change the DHCP settings for each VLAN to whatever we need.
Now go to Services >DHCP Server and a new screen will load. At the top of the page there should be a list of the VLANS you configured
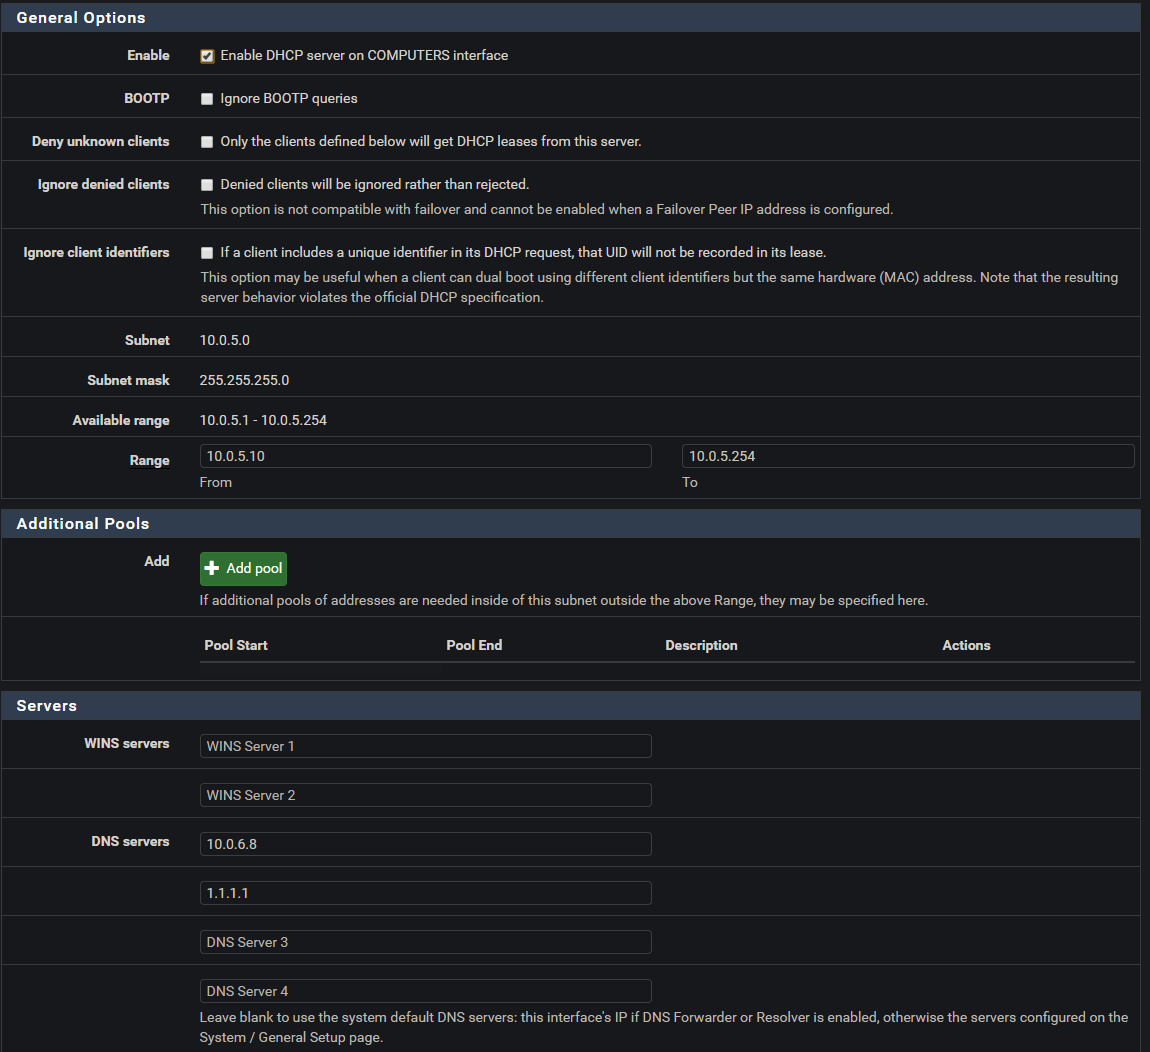
Here you will want to adjust your DHCP settings for each of your VLANS. The most important being.
Range: Depending on the sub net mask you set, increases or decreases the amount of IP addresses available for DHCP to address. Typically I leave the first 10 out of the DHCP scope for manually addressing
DNS Servers: Here you add the DNS servers you want to use on this VLAN.
There are more settings but these are the required options. you can change the others as you wish.
There are firewall rules required because when operating in VLAN mode the firewall will only allow white-listed traffic through however i will cover this in the next topic.
Step 2 Adding VLANS to your Network Gear
I have D-Link DGS-1100 series switches in my network, however having all the same series did not make creating my VLANS easy as they had different settings for the same thing when applying VLANS. In this i will show you the differences in each stage.
Before we start the configuration we need to get some terms down.
Trunks: A trunk line is a port that allows tagged traffic to flow to another location
Access: A port that allows access from un-tagged traffic tagging it it in the process with a defined VLAN tag
Untagged: Network Traffic without a VLAN tag attached
Tagged: Network Traffic with a VLAN tag attached
First thing we need to do on our switches is add all the VLAN tags we created earlier to them. Log into your switches (if you have not set them up yet i advise going through the initial set up process in the manual)


As you can see even though these switches are in the same family their config pages are different. however the premise is the same on both add VID (VLAN) then you add a name for reference later.
Now that we have added the VLANS its time for the fun part of adding IP addresses and management VLANS
With these switches the first port is default the management port but we will need to change that. We will reassign the last port to the VLAN we will want to manage these switches from.
On the DGS-1100-16 this is done by going to L2 Features > VLAN > VLAN Interface. You then select the port you wish to use in this case 16 and click the edit button. This will being up the below page.

Change the below settings
VLAN Mode: Access Only
Acceptable Frame: Untagged only (will make it so this port will only accept Untagged packets)
VID: VLAN ID of the management VLAN
On the DGS-1100-08 this is done by going to L2 Features > VLAN > 802.1Q VLAN. This is the page you created the VLANS on this switch. From here select the VLAN id for the management VLAN. This will open the below page.

On this page you need to add the port's radio button to untagged to allow you to access that VLAN from that port.
Now we should be able to connect to our switch when its has been set to only accept a connection from a management VLAN. Now this part looks largely the same on both switches.
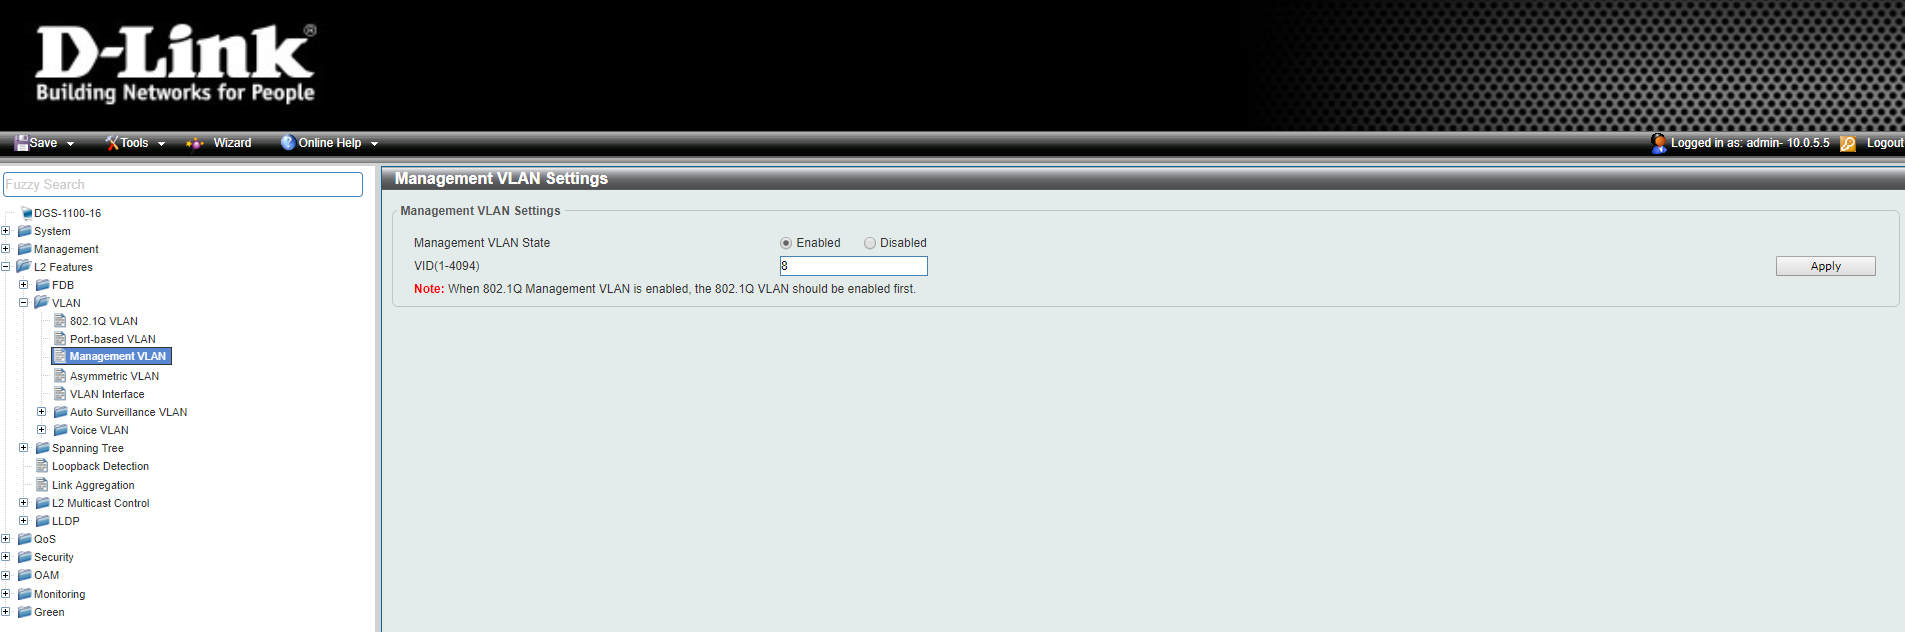
Set the id you want then apply, this should stop the default port from working and you will need to plug into the port we just configured and you should regain access. Now we need to change the IP of the switch this can be found on both System > System Information Settings > IPv4 Interface.
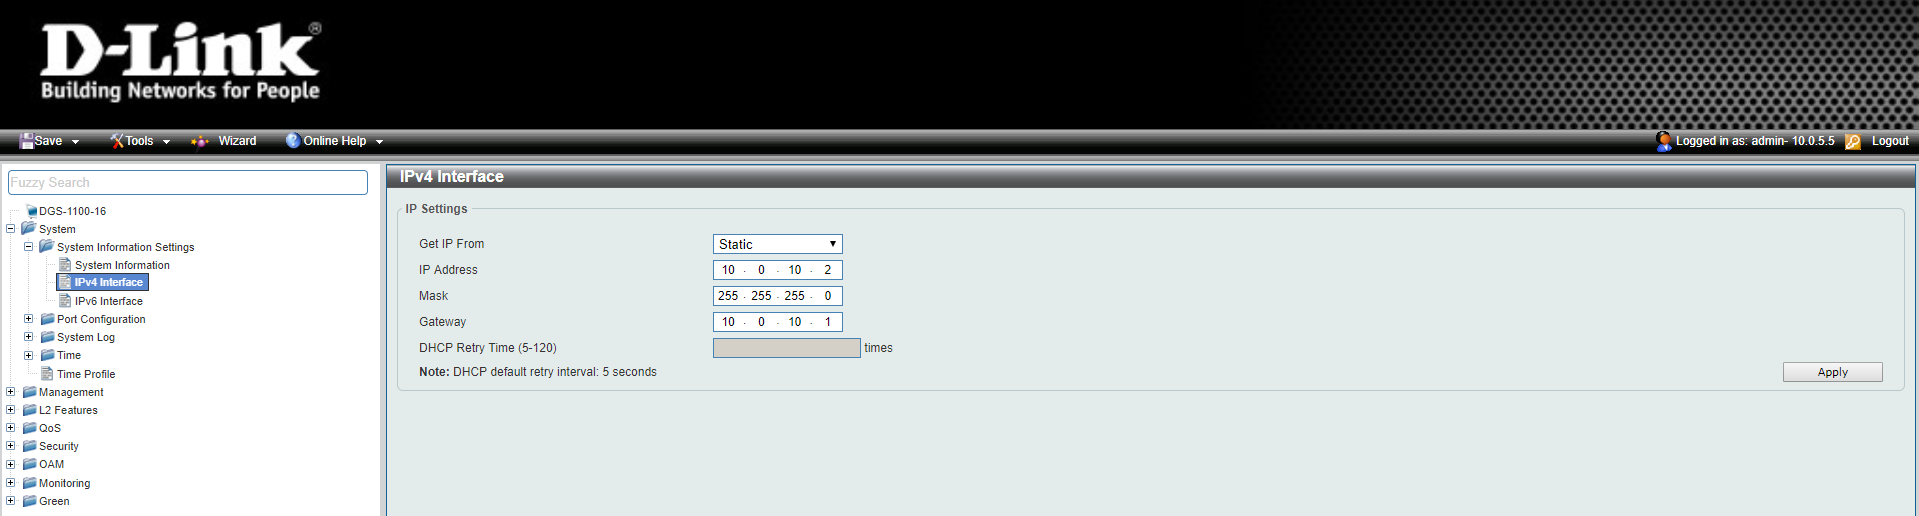
Change the gateway, subnet and the IP to match your desired config. When you hit save you will loose connection again but just connect using the IP you just gave the switch.
When you get back you will need to save your config by hitting save in the top right.now if you have multiple of these switches you can save the config and then apply it to the others through Tools > Configuration Backup And Restore. Then all you need to in future is change the IP.
Now for the final part we need to create trunks to allow tagged packets to flow between switches.
For the DGS-1100-16 this is fairly simple.go back to the following menu L2 Features > VLAN > VLAN Interface. Select the port you witch to trunk data and click the Edit button.
Change the VLAN Mode: Trunk, When changed the screen will change to look like the below.

No need to change anything else that's it.
On the DGS-1100-08 its more involved. when you go to L2 Features > VLAN > 802.1Q VLAN and for EACH of your vlans on the Port / Ports you want to use as a trunk you need to move the radio button to Tagged and that will make it into a trunk port.
Once you have your switches in place you will need one trunk between the switches and one running to your PFSense router and you will be all done!
Next will be the fun part firewall rules!