Network issues after migrating Linux Server from Hyper-V to VMware

I am writing this because of an issue I came across at work. We are in the process of migrating some servers from Hyper-V to VMWare, So before we began we wanted to make sure that we could convert these servers without any issues with the machines. I will document the basics of creating and converting a test machine as well as fixing the issue that i found.
After creating my test virtual machine (Ubuntu Server 18.04) in Hyper-V which involved creating a docker with some working data in it. I then exported this from my computer to a Hyper-V server on my test network. After testing that it was still working after the conversion it was time to Install “VMware vCenter Converter Standalone Client” VMware actually make you jump through a few hoops to get their software so i'm going to guide you through this. To download this client go to the below link

On this page click on download. You will be prompted to log in, Now don't worry you don't need to pay to create an account and when you do this software is available for free. Now my recommendation is that you install this on a separate machine to your Hyper-V Machine for the actual conversion. This is a next next affair, Also for the sake of ease you will need to install the agent on your Hyper-V machine which is also a fairly simple affair.

Now it's time to convert the machine, I have found this fairly quirky on your second machine open “VMware vCenter Converter Standalone Client” once opened click convert machine in the top right. This will open a new window.
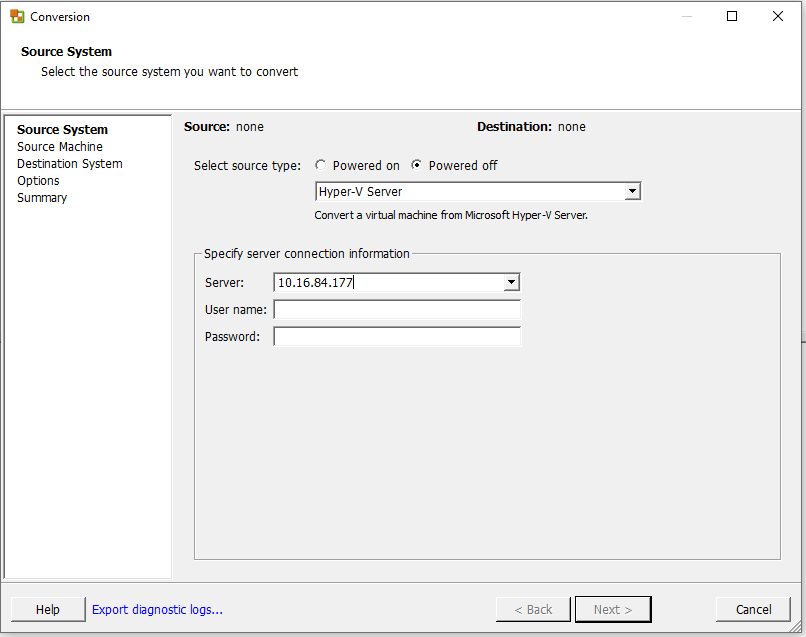
For this we will be selecting “Powered off” and then Hyper-V Server. After this enter the IP of your server and then some admin credentials. You will get a certificate error warning click ignore and you will be granted with the next screen. Select your VM from the list and click next. And you get greeted by the below page.

Select the same destination type and VMware product as I have selected. Now to actually save the converted VM you need a network share, There is no option to save locally without jumping through a hoop…. Which I have done. Create a shared folder on the local computer then you need to find the IP address of the computer and enter <ipadress>/<share> into the destination field followed by some admin credentials click next, next finish. And you vm will then be converted
Once Converted we now need something to run our VM, as long as your not using the software commercially its a free download from here. First problem i ran into was here, VMware and Hyper-V really do not like each other. If you have Hyper-V installed VMware will not run VMs. This is why i have separate machines. So once you have downloaded workstation player install it on your conversion machine open the program and select the “Open a virtual machine” option on the right of the screen. Then you just need to find where you locally saved and open it.
This is where I encountered the main issue i had no network connection. To sanity check that the networking was working in this VM manager, I created a brand new VM from scratch and that worked.
After a few hours scratching my head searching the internet for a few hours (I have very basic knowledge with Linux) i decided to see if there were any new adapters in my system. So i ran
Ifconfig -a
This showed me there was indeed another adapter that was installed as part of the conversion but it was disabled. So to enable this adapter enter the below command where “adaptername” is the name of the adapter e.g eth0
Sudo ifconfig "adaptername" up
Now for me i had some custom configurations attached to my old adapter, This server uses netplan for its network configuration and the file for this configuration is located /etc/netplan/, i had a file in this folder called 50-cloud-init.yaml yours could be different. So to change this configuration i entered the below command to open the file in the nano text editor.
sudo nano /etc/netplan/50-cloud-init.yaml
In the text editor, you need to find the name of the old network adapter and replace it with the name of the new one we found earlier then press ctrl+x to exit and then select save your changes. Restart the virtual server to apply the changes and the network should now be working on the converted virtual server.