Replacing Shinobi with Unifi Protect

In a previous post here I went through creating a shinobi server and using it with Reolink cameras. While this system had a great upside of the software being free there were a few downsides that I noticed while using this which I will document below.
Constant Notifications
While I did manage to set up motion notifications on Shinobi there was one drawback, I would get the notifications while I was home. This is because Shinobi does not use any app it cannot track you and because of this, it cannot tell when you are home. Unifi Protect on the other hand you can configure it to notify you always like Shinobi however you can easily change it to the below modes as well at the push of a button.

Cameras have 2 notifications they can send “Offline” and “Motion”. This makes it more secure as you can know about a malfunction or if someone is breaking in and cutting the cameras.

You can also configure a notification of when users arrive or depart if you would like which could be handy in more secure locations.
Remote Viewing
The Shinobi experience on android does allow the viewing of video, The iPhone experience was less than stellar. The video codec used by Shinobi is not compatible with the iPhone browser, this means you have to use something called JPEG mode. This is a 1 fps video and you cannot bring up the video history. So if you got a notification for movement by the time you get into the web app on iPhone the reason for the movement was gone and you can not check the video history to see that movement.
A little preface have Unifi Protect to “record” motion events, Any camera you install is set to record always if you have this setting your app may look different to mine.

When you tap on a notification you are brought to the page above. You can see the timeline below the image with the blue sections representing motion events. Recall how I said I have it set to record motion only its not just recording motion you can view the entire timeline just by dragging the horizontal line to when you want to view wherever you want to view it as the app is on both Android ios or anything with a web browser.
Server
While the server set up of Shinobi can be quite involved as documented here. Set-up for the Cloudkey Gen 2 + is simple in comparison, Plug it in browse to the IP on the screen and follow the setup instructions. That’s it for the controller to add cameras just connect them to the same subnet as the controller they will appear in the UI and you can adopt and change their settings from that same UI.

Shinobi Can add the cameras with and ONVIF scanner, you need a username and password to add them and then you will need to change settings from there dependant on the camera such as copying or re-encoding the stream etc.

Updating is also a click and forget affair log into the controller via browser and click the update button. Shinobi you will need to log into the command line to do this. As with most Linux upgrades, there is no guarantee you will not break something by doing the upgrade.

A downside of the change to Protect was having to buy the server, while I could host Shinobi as a VM on my Unraid servers and even the old Unifi video could be self-hosted (recently discontinued) could do the same Protect requires hardware (Cloudkey Gen 2 + or UniFi Protect Network Video Recorder). The upfront cost for this is £160 for the Cloudkey and £290 for the UniFi Protect Network Video Recorder, Which considering the free updates is not much for the services offered.
Cameras
I described the pairing process above in the server section I would like to go over the camera software in this section. So I will be comparing the Reolink cameras I had to the Unifi G3 Flex cameras I have now.
The Reolink cameras do require set-up before you can connect them to Shinobi, I do not ever recommend leaving the settings (Username and Password) as default. One of the reasons I chose to upgrade was the software on the Reolink cameras. Even after 2 firmware updates, the webpage still uses Flash to view streams from the camera instead of HTML 5. This is due to be Unsupported in most browsers by the end of this year because of the security venerability’s present in it that lead to Adobe stopping development.
So as the cameras were using out of date applications you really can’t trust other aspects of the cameras, my cameras are not internet-facing so this was not much of a problem. But I would still lose the ability to view them directly come to the end of the year. Now with other camera makers, I could not guarantee the same issue however I had heard good things about Unifi so I decided to give it a go.
Settings for the Protect cameras are all controlled via the Protect app meaning you only have to visit 1 website for all your settings instead of 3 for my previous system.
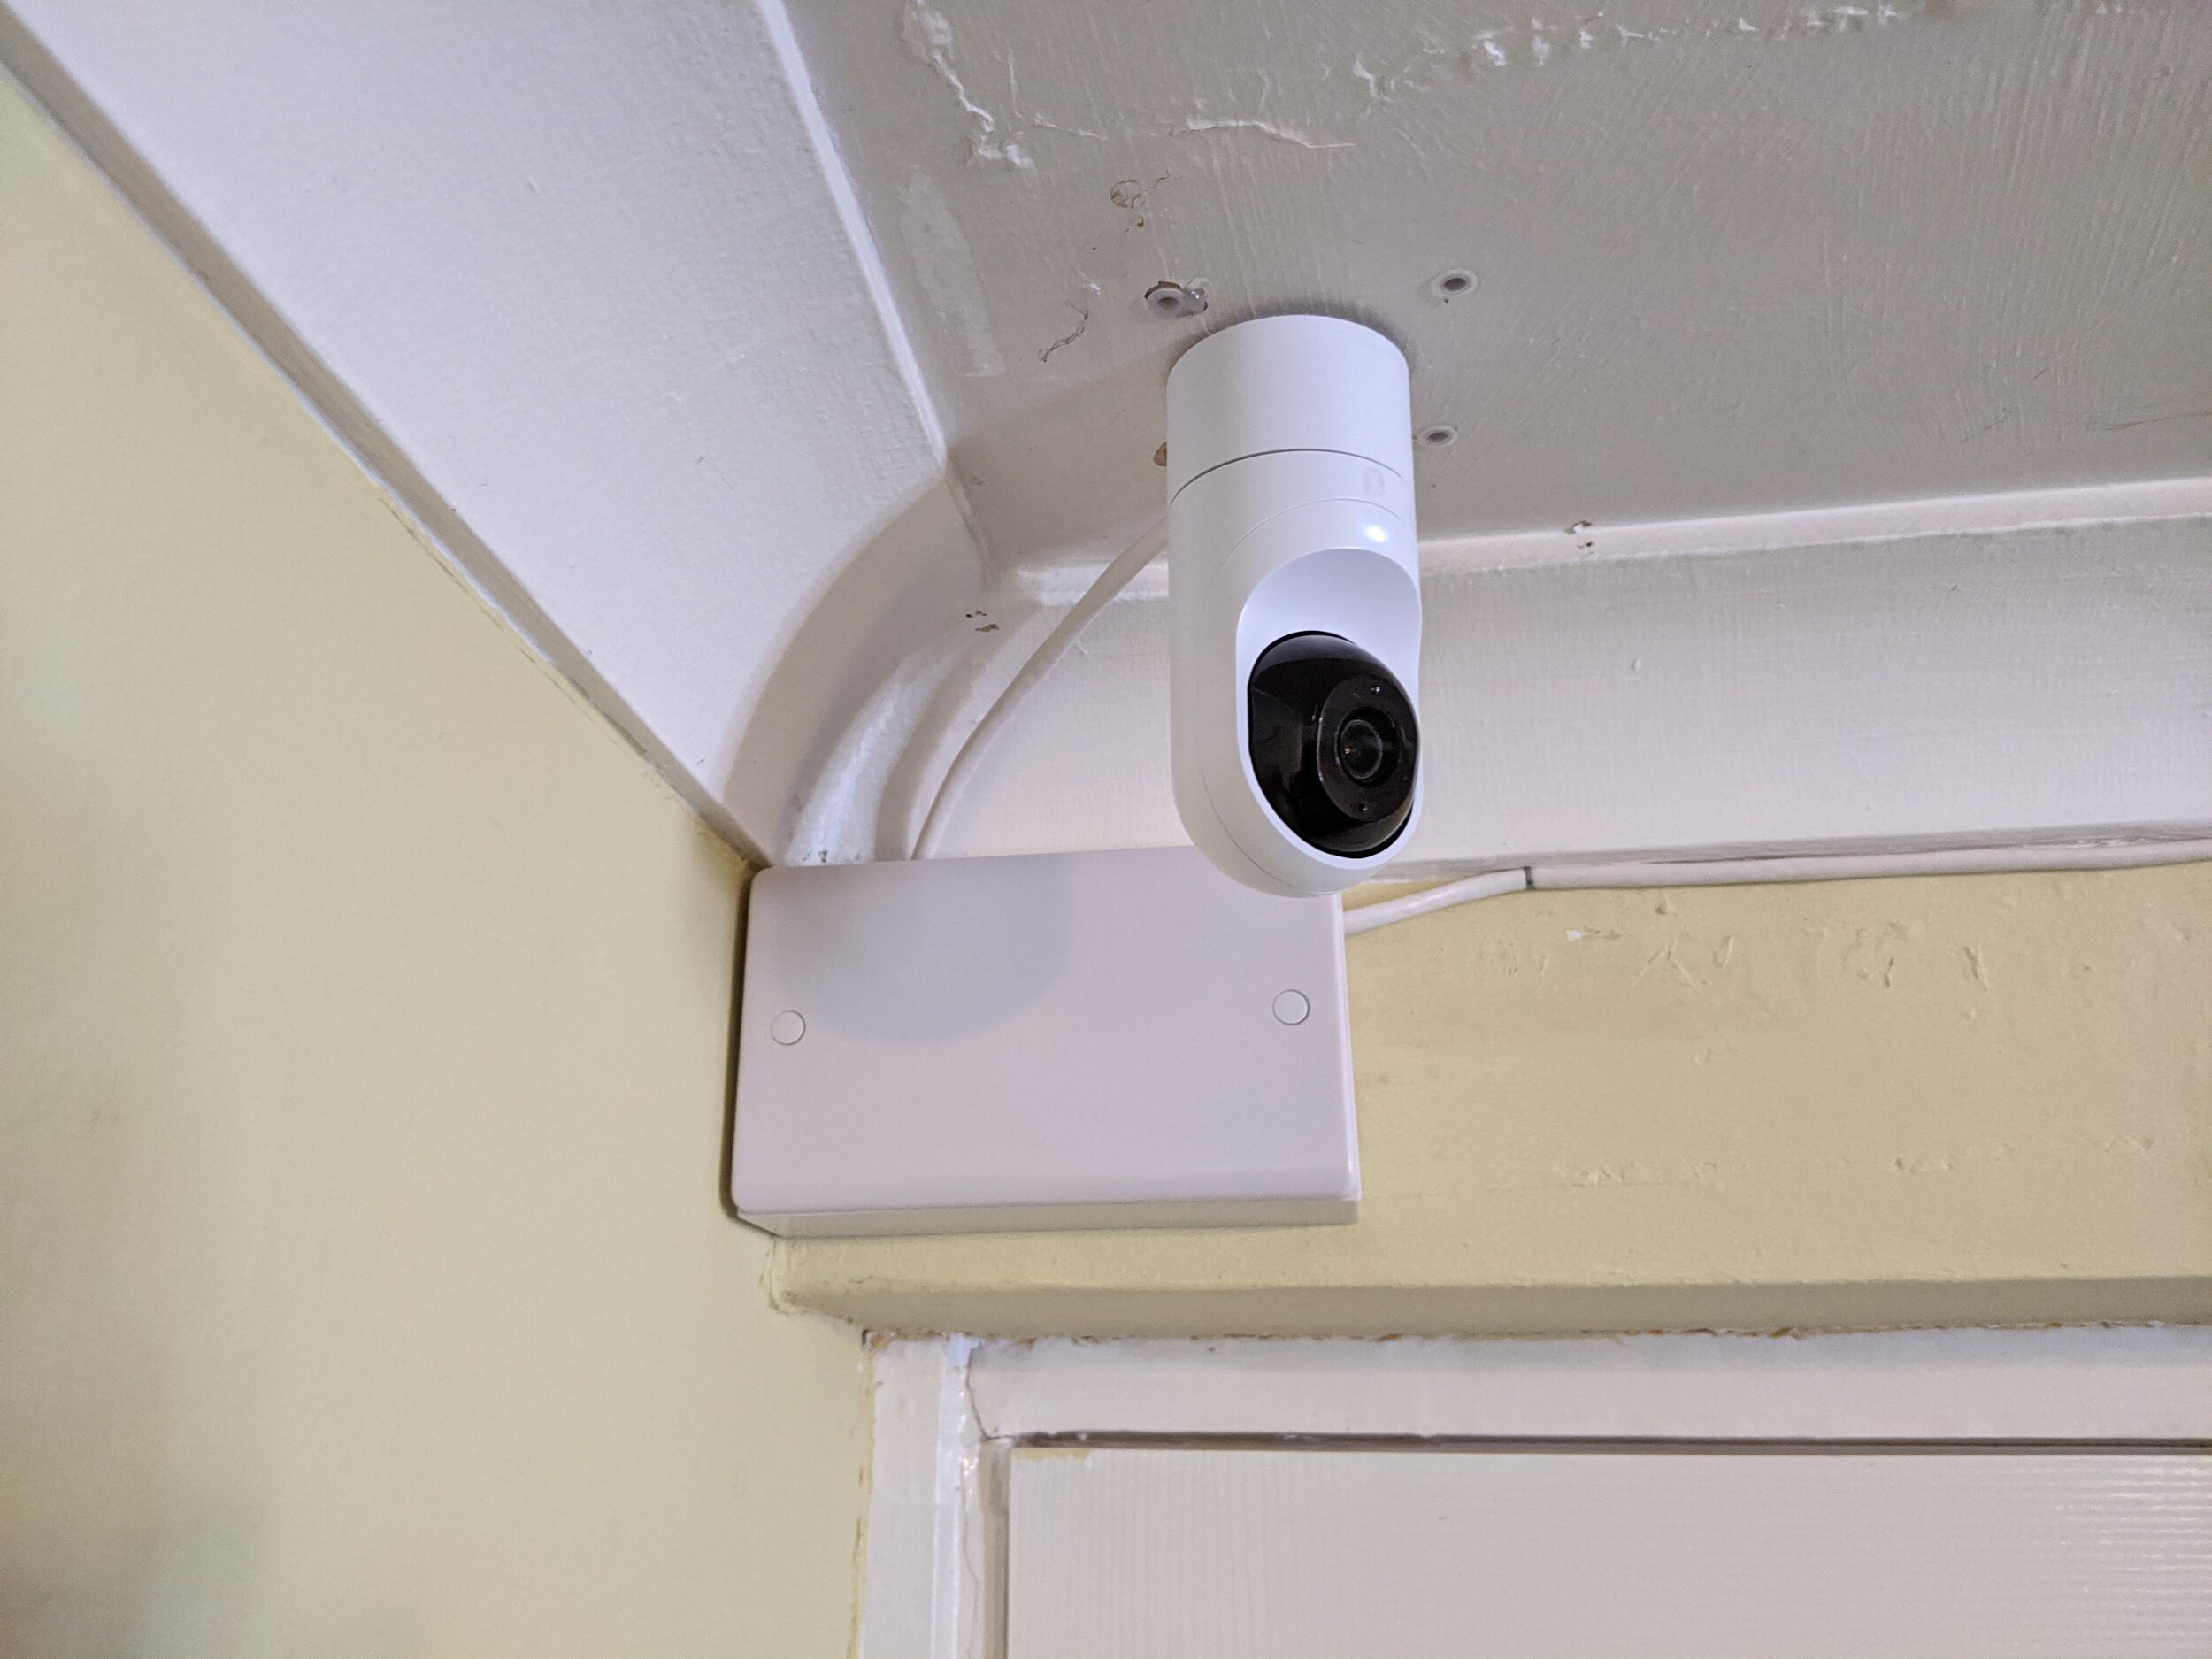
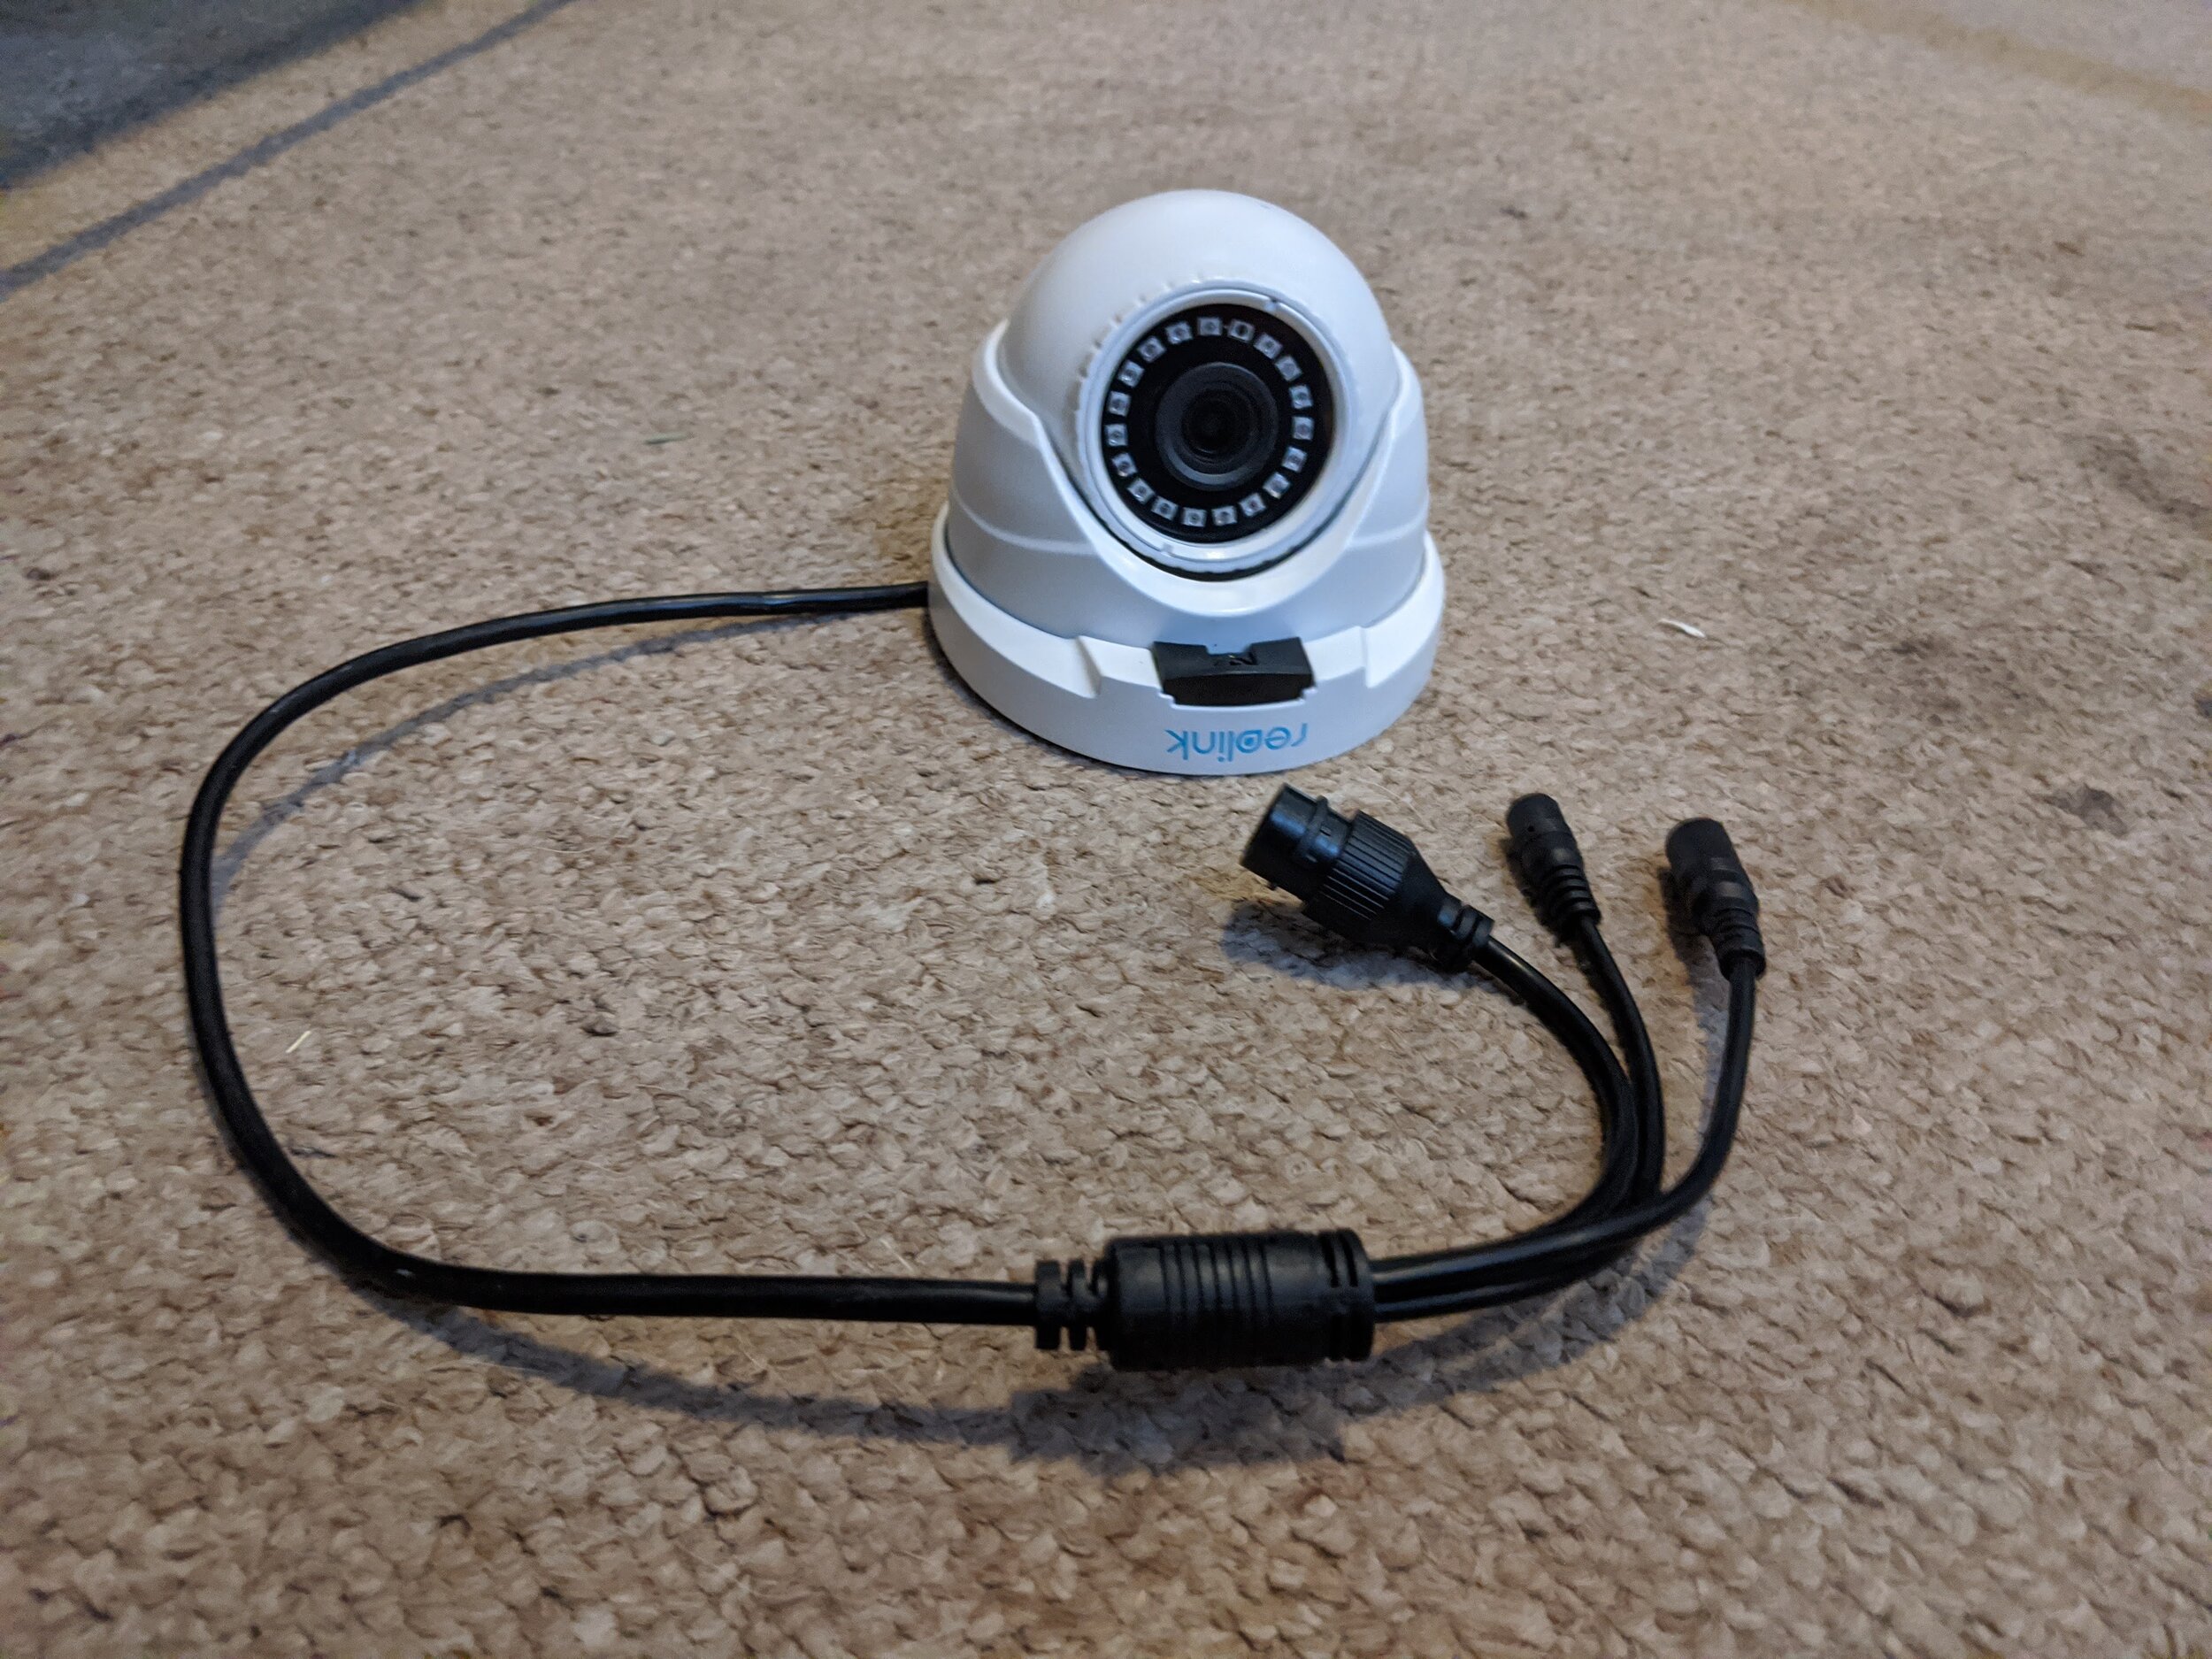
Lastly, My Reolink cameras have a tail with their connectors coming off from them, to get around this I had to fit a junction box behind them to hide the mass of cables as you can see in the pic above. From what I can see of Protects line of cables none of them has this affliction with all of them having the network cable terminating inside the camera body.
Final Thoughts
I have now had Unifi Protect installed for a month and can’t be happier it’s like having nest with local storage, I am working on having this storage backup to a network location but for now I’m not too worried. Speaking of storage after a month we are sitting at about 125 GB used compared with Shinobi using 330 GB used. So while the unit supports 15 cameras with Unifi network running you may not need to upgrade the storage you will probably have to if using 20 cameras. I will be adding to this system in the future with an outdoor cam and the doorbell cam when it becomes available in Europe.